You are currently browsing the category archive for the ‘How-to…’ category.
In april I wrote about getting reacquainted with origami. Remember I made some flowers to decorate a present?
Some of you asked how I did it and I decided to make a video… Let me tell you: that’s easier said than done! ;) But I’m going to present my 7-minute amateur film anyway, since this month’s mission for Hello Japan! is to create some origami. And who wouldn’t want to be eligible for that awesome prize consisting of kawaii origami paper and droll geisha bookmarks?
If you’re familiar with the art of paper folding, you may want to know that we’re starting of with a bird base (of which the well-known origami crane is created), folding it into a ‘small kite’.
And if you’re an origami newbie and I’m working too quick for you — or the video is too vague, knowing this will enable you to search for additonal instructibles on the web. ;) But try and watch this first!
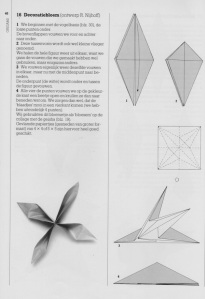
I have also scanned the instructions I originally used myself. They’re in Dutch so I will redirect you to some English sources and roughly translate the part I couldn’t find online.
It’s best to choose some flamed origami paper for this flower.
- Start with a square base with the coloured side of your paper down.
- Continue to make a bird base.
- Follow the instructions accompanying the picture below.
Have fun!
 Hello Japan! is a monthly mini-challenge focusing on Japanese literature and culture. Each month there is a new task relating to some aspect of life in Japan.
In the past I’ve referred to Maki’s tutorial on how to make a Japanese switchback cut. It’s really easy to do and looks great!

I also mentioned that my technique (originating from the book The Decorative Art of Japanese Food Carving) is a bit different: it does not leave any leftovers. As promised: here’s my own ‘instructible’! I’ll be thorough, so bear with me ;)
First: the chigai-giri, or ‘opposing cut’, as it is also called, can be best performed on fruits or vegetables with a skin that clearly contrasts the inside. I do use it on gherkins, but it’s much fancier on bananas and cucumber!
Are you ready? Here we go!

So, you’ll need a straight piece of your fruit or vegetable and a sharp knife. Preferably one with a blade that cuts on both sides, but I do not own any.

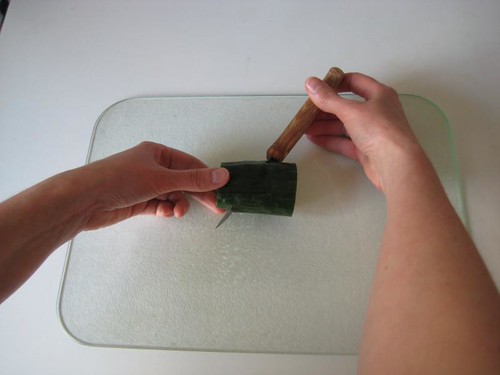
You’re going to cut your knife through the center of the cucumber, about 1 cm from the end. Note that the sharp side of my knife is on the right.

Cut right-angled, all the way through the center of the veggie, staying 1 cm from the side. In the picture it looks as if my cut went awry but it didn’t! And it wouldn’t really matter that much either ;)

Now, pull the knife out again and turn so that the sharp side is on the left. If you’ve got a double-sided blade you can skip this step.

Put the knife back in at the point where you just pulled it out and slice it all the way to the left — but stop at about 1 cm from the side again.

Pull out your knife and put it crosswise on the cucumber. Have the point of your knife approx. where your cut ends at 1 cm from the side and hold it askew to make a line ending about 1 cm from the other side.

Now cut carefully to the middle of the cucumber: just to the slice you made in the first steps. Do NOT cut all the way through!

Turn the vegetable upside down. Of course I usually pull out my knife first but I wanted to show you that I really only sliced halfway through.

Now do exactly the same as in step 3. So point your knife in the same direction as you did before and cut to the core of your cuke.

TADAAH! You can easily pull both parts aside.
I know I used a lot of pictures to show you how to make an opposing cut, but it really is easy peasy! Just try it!
I’d like to point out that my cuke is organic. I was told once by a nutritionist that cucumber is a vegetable collecting so much pesticides directly under its skin, it’s not healthy to eat without peeling it first. Mind you, that was a long long time ago ;)
Why don’t you join Beth Fish’s weekend cooking with a food-related post?


